

Imagine moving into your brand-new home, only to find your video calls freeze in the office, your smart lights won’t connect in the bedroom, and running one new internet cable means tearing into fresh drywall. Frustrating, right? This is exactly why planning your structured wiring for new construction is the single most important tech decision you’ll make.
Getting it right means more than just internet access. It’s about creating a truly future-proof, smart home-ready network with reliable Wi-Fi in every corner, from day one and for decades to come. This is especially true with new standards on the move, making a plan based on the latest 2026 NEC Code book guidelines a smart move.
So, if you’ve ever wondered, “what do I need to know before pre-wiring a house?” you’re in the perfect place.
Understanding Structured Wiring
Okay, let’s be real for a second. You know those two or three internet cables the builder usually throws in behind the TV? That’s not a plan. That’s a hope and a prayer that Wi-Fi will magically cover everything. And when it doesn’t, you’re stuck with dead zones, buffering videos, and that one smart device that just won’t connect no matter how many times you yell at it.
So, what are the steps before installing structured wiring? It starts with understanding what it actually is.
Think of your home’s regular electrical wiring as plumbing for water. It gets power to your outlets. Structured wiring is like building a separate, dedicated plumbing system just for data, for your internet, your streaming, your security cameras, your everything.
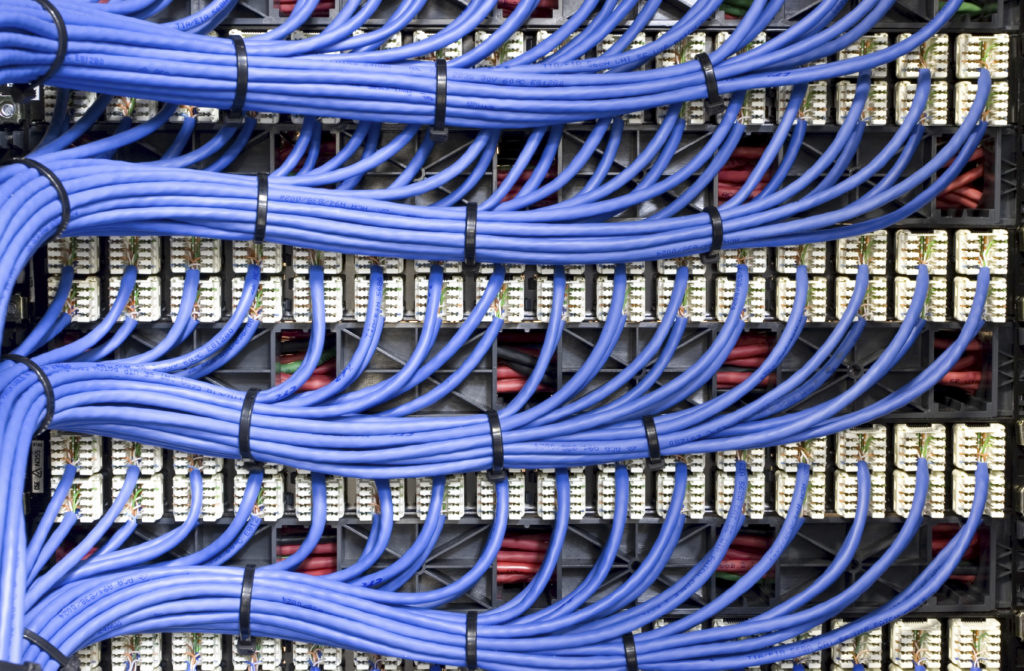
The superstar of this whole setup is the structured wiring enclosure. Think of it as the mission control center, usually tucked in a closet or basement. Every single one of those data cables from your office, living room, and bedrooms runs back to this one neat panel. It’s where your modem, router, and switches live, keeping everything cool, organized, and easy to upgrade later (which we’ll get to when we talk about setting it up).
Importance of Pre-Installation Planning
Let’s be honest: skipping the planning phase is like trying to build IKEA furniture without the instructions. You might get something that looks right at first, but it’s wobbly, a drawer is stuck, and you have three mysterious screws left over. With your home’s wiring, that “wobble” is a Wi-Fi dead zone in the kitchen, and those “extra screws” are thousands of dollars in drywall repair later.
This is why a solid pre construction wiring plan is your absolute best friend. It’s the step that answers the big question: “What do I need to know before pre-wiring a house?” The answer is everything about how you live.
Are you working from home and need rock-solid video calls? Do you have kids who game and stream in their rooms? Dreaming of a wall-to-wall home theater? Your pre installation wiring steps need to map all of this out on paper before a single wire is pulled.
Here’s the kicker; this planning isn’t just about convenience. With the new NFPA 70 2026 standards coming into play, especially for low-voltage and home automation wiring, getting your plan right from the start means it will be safe, compliant, and ready for inspectors. A good plan today means you won’t have to tear into walls tomorrow to add a new security camera or upgrade to a faster network.
Step-by-Step Guide: 7 Pre Install Structured Wiring Steps
Now that you see why planning is everything, let’s break down the how. These seven steps are your blueprint to avoid that “wiring nightmare” we just talked about. Follow them, and you’ll move into a home that’s genuinely ready for the future.
Step 1: Design Your Structured Wiring Plan
This is where your pre construction wiring plan comes to life. Grab your floor plans and think like a detective. Where will you actually work, stream, game, and relax?
- The Home Office: Don’t just plan for one laptop. Think desktop, printer, phone, and a dedicated line for a video conference system. An expert would recommend at least two Ethernet ports here.
- The Media Wall: Your TV, game console, streaming box, and sound system all hate sharing Wi-Fi. A bundle of cables here (three or four) is the secret to flawless 4K streaming.
- Ceiling Access Points: This is the trick most builders miss. Wi-Fi routers hidden in cabinets are crippled. Plan for dedicated cables in central ceiling locations on each floor for invisible, professional-grade Wi-Fi that blankets your home.
Getting this map right is the most important pre installation wiring step you’ll take.
Step 2: Choose the Right Cables for 2026
Here’s a question we hear all the time: “Should I use Cat6 or Cat6a for new construction wiring?” Let’s settle it.
Think of Cat6 as a reliable country road—it’s fine for today’s traffic (1-10 Gigabit speeds). Cat6a, however, is a future-proof superhighway. It’s designed to handle 10 Gigabit speeds at full home distances and has better shielding against interference. For the small incremental cost today, running Cat6a everywhere, especially to those key spots like your office and media center, is a no-brainer for structured wiring 2026 and beyond.
And for the ultimate future-proofing? Ask your installer to run a single, thin single-mode fiber optic cable from your internet entry point to your wiring panel. This is your ticket to multi-gig and even 10-gig internet speeds down the road without any new construction.
Step 3: Pre-Wire for Home Automation
Home automation wiring isn’t just about today’s gadgets. It’s about the ones you’ll buy in five years.
- Security: Run cables to front and back door corners for PoE (Power over Ethernet) cameras, and to door frames for smart locks.
- Comfort: Have a wire run to your thermostat location and to window frames if you think you’ll want smart blinds.
- Audio: Even if you don’t install speakers now, running “smurf tube” (conduit) to key ceiling spots for future speakers is a genius move.
The rule is simple: If you might want it later, put a wire there now.
Step 4: Install Conduit & Cable Pathways
Speaking of conduit, this is the ultimate pro move. For any run that might be hard to access later, like from the basement to a second-floor office, or outside for future landscape lighting, install an empty conduit pipe. It acts like a permanent fishing line through your walls. Ten years from now, when a new technology needs a new cable, you just pull it through the conduit. No drilling, no dust, no drama. This is the hallmark of a truly thoughtful structured wiring installation.
Step 5: Centralized Structured Wiring Enclosure Setup
Remember that structured wiring enclosure we called “mission control”? This is where it gets real. Your panel location needs:
- Power: At least two dedicated outlets for modem, router, and switches.
- Space: Get a panel larger than you think you need (like a 28-inch). Empty space is cheap now; adding a second panel later is not.
- Cooling: Make sure it’s on an interior wall (not a hot garage) and has ventilation. Electronics generate heat!
A clean, spacious, well-powered panel is the sign of a professional-grade structured wiring system.
Step 6: Labeling, Testing & Documentation
When your installer is done, every cable at the panel should have a clear tag: “Master Bedroom TV,” “Kitchen Ceiling AP,” “Front Door Camera.” This isn’t just tidy; it’s important for troubleshooting and upgrades. A labeled system is a maintainable system. This simple step separates a usable structured cabling system from a mysterious rat’s nest.
Step 7: Compliance & Safety Checks
This last step is about peace of mind. A reputable installer will follow the NFPA 70 2026 guidelines for low-voltage wiring. They’ll make sure cables are properly separated from high-voltage electrical lines, use fire-rated seals where wires pass through floors, and test every single cable run to certify it’s working perfectly before the walls are closed up. This ensures your system is not only smart but also safe and built to last.
Wrapping It Up: Your Future-Proof Home Awaits
Let’s circle back to where we started. Imagine moving in and everything just works. Video calls are crystal clear, movies stream without a hiccup, and your smart home devices respond instantly. That’s the peace of mind a proper pre install structured wiring plan delivers. It’s not an expense; it’s one of the smartest investments you can make in your new home’s comfort, functionality, and value.
This kind of structure wiring is rarely a DIY job. To truly future-proof your home, you need a team that’s not just handy, but expertly certified. That’s where we come in with our structured wiring services.
At SafeZone, our licensed professionals handle your entire structured wiring installation, ensuring every cable is perfectly placed for the life of your home. Simply give us a call at 17182183838 or visit our service page at https://safezone.nyc/structured-wiring-service/ to learn more about how we build the connected foundation for your future needs.
Frequently Asked Questions
What are the steps before installing structured wiring?
Start by creating a detailed “Smart Home Roadmap” using your floor plan. Identify every location for workstations, TVs, security devices, and Wi-Fi access points.
What do I need to know before pre-wiring a house?
You need to understand how you live and plan for the future. Consider your work-from-home needs, entertainment setup, and smart home goals. Most importantly, know that planning before the drywall goes up is infinitely easier and cheaper than trying to add it later.
What type of cables are best for structured wiring in 2026?
For a truly future-proof setup, Cat6a Ethernet cable is the recommended standard for all key runs. For the ultimate in bandwidth, also consider installing a single-mode fiber optic cable from your internet entry point to your central panel.
Should I use Cat6 or Cat6a for new construction wiring?
For new construction, choose Cat6a. While Cat6 is sufficient for today, Cat6a supports higher future speeds over longer distances and has better shielding. The small additional cost now is a wise investment for your home’s next 20 years.